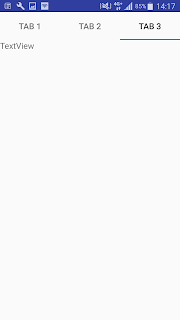
1. 如何使用TabHost。
2. 如何在分頁套用其他Activity。
3. 如何預設Tab在指定頁面。
首先Layout部分的配置。
File Name:activity_main.xml
<LinearLayout xmlns:android="http://schemas.android.com/apk/res/android"
  xmlns:tools="http://schemas.android.com/tools"
  android:id="@+id/LinearLayout1"
  android:layout_width="match_parent"
  android:layout_height="match_parent" >

  <TabHost android:id="@android:id/tabhost"
    android:layout_width="match_parent"
    android:layout_height="match_parent"
    android:layout_weight="1" >

    <LinearLayout
      android:layout_width="match_parent"
      android:layout_height="match_parent"
      android:orientation="vertical" >

      <TabWidget
        android:id="@android:id/tabs"
        android:layout_width="match_parent"
        android:layout_height="wrap_content" >
      </TabWidget>

      <FrameLayout
        android:id="@android:id/tabcontent"
        android:layout_width="match_parent"
        android:layout_height="match_parent" >

        <LinearLayout
          android:id="@+id/tab3"
          android:layout_width="match_parent"
          android:layout_height="match_parent" >

         <TextView

            android:layout_width="wrap_content"
            android:layout_height="wrap_content"
            android:text="TextView" />

        </LinearLayout>
      </FrameLayout>
    </LinearLayout>
  </TabHost>
</LinearLayout>
File Name:activity_a1.xml
<?xml version="1.0" encoding="utf-8"?>
<RelativeLayout xmlns:android="http://schemas.android.com/apk/res/android"
    xmlns:tools="http://schemas.android.com/tools"
    android:id="@+id/activity_a1"
    android:layout_width="match_parent"
    android:layout_height="match_parent"
    android:paddingBottom="@dimen/activity_vertical_margin"
    android:paddingLeft="@dimen/activity_horizontal_margin"
    android:paddingRight="@dimen/activity_horizontal_margin"
    android:paddingTop="@dimen/activity_vertical_margin"
    tools:context="com.ray.test.testingtabhost.A1">

    <Button
        android:text="Page 1"
        android:layout_width="wrap_content"
        android:layout_height="wrap_content"
        android:id="@+id/button"
        android:layout_centerVertical="true"
        android:layout_centerHorizontal="true" />

</RelativeLayout>
再來是Java檔的撰寫。
File Name:MainActivity.java
import android.app.TabActivity;
import android.content.Intent;
import android.os.Bundle;
import android.widget.TabHost;
import android.widget.TabHost.TabSpec;

public class MainActivity extends TabActivity {

    @Override
    public void onCreate(Bundle savedInstanceState) {
        super.onCreate(savedInstanceState);
        setContentView(R.layout.activity_main);

        TabHost tabHost = getTabHost();

        TabSpec spec = tabHost.newTabSpec("t1");
        Intent it1 = new Intent(this,A1.class);

        spec.setContent(it1); //Setting the activity of t1
        spec.setIndicator("Tab 1");  // Naming the name of Tab
        tabHost.addTab(spec);

        TabSpec spec2 = tabHost.newTabSpec("t2");
        Intent it2 = new Intent(this,A2.class);

        spec2.setContent(it2);
        spec2.setIndicator("Tab 2");
        tabHost.addTab(spec2);

        TabSpec spec3 = tabHost.newTabSpec("t3");
        spec3.setContent(R.id.tab3);
        spec3.setIndicator("Tab 3");
        tabHost.addTab(spec3);

        tabHost.setCurrentTab(1); // Setting the default Tab
    }
}
File Name:A1.java
import android.app.Activity;
import android.os.Bundle;

public class A1 extends Activity {

    @Override
    public void onCreate(Bundle savedInstanceState) {
        super.onCreate(savedInstanceState);
        setContentView(R.layout.activity_a1);
    }

}
File Name:A2.java
import android.app.Activity;
import android.os.Bundle;
import android.view.Gravity;
import android.widget.TextView;

public class A2 extends Activity {

    @Override
    public void onCreate(Bundle savedInstanceState) {
        super.onCreate(savedInstanceState);
        TextView txt = new TextView(this);
        txt.setGravity(Gravity.CENTER); // Setting position of the object "txt"
        txt.setText("Page 2");
        setContentView(txt);
    }

}
以下是此次示範的成果。
▼由於tabHost.setCurrentTab(1)的關係
所以一開始預設是在Tab2


沒有留言:
張貼留言